Showing posts with label how to. Show all posts

Saturday, March 31, 2012

Gardening (and Guinness) Is Good For You!

Spring clean up around here is no joke. I have a pretty good workout regimen, but I know there's no need to feel guilty when I skip my cardio on the weekends. The raking, the squats, the lunges, the pulling, the pushing, a few hours in and I've burned off breakfast and lunch combined.

We all know that gardening is good for you, mentally, physically and even spiritually.
But, here are some fat-burning facts about gardening that you may not know:

Gardening can burn an average of 167 calories for every 30 minutes, and involves strength and flexibility-building moves. If you're into the heavy-duty activities like hauling around 40-pound bags of soil and digging new beds, you'll torch even more calories.

Some experts believe that gardening and activities involving nature can lower blood pressure, boost immunity and reduce stress. My favorite way to decompress after a long day is pulling weeds. Instant gratification and a perfectly acceptable method of projecting rage.

Getting back to nature can increase your attention span and improve your mood. Combat that multitasking mental fatigue by focusing on a new project like containers, windowboxes or digging a new bed.

Remember to protect yourself while outside. Apply sunscreen and/or bug spray, stay hydrated and lift with your legs, not your back. Etc. Etc. Now go sow some seeds, then grill your burger. Put cheese on mine, I've earned it.


Perfect before-and-after photo op. Yes, that's me and my bottom, working away at the soil (very tough soil).


And after. Bottom not included, but I assure you, it got a workout.


Sources: 
CNN 
Livestrong 
WebMD

Wednesday, March 28, 2012

The More You Know

We're off and running in a new season where I'm fully prepared to give you my unsolicited advice, starting with a brief list of DOs and DON'Ts.

Weeds: Know Your Enemy
Don't let weeds overpower your gardens. Do find a way to manage them regularly, such as pulling out after a fresh rain or on a seriously humid day. Do know your enemy. The antagonistic relationship between you and your weeds will always exist, but not every weed is bad. Check out Good Weed, Bad Weed for a quick reference of what's growing, what to yank and what to spare.


Flowers: Know Thyself
Don't, I repeat, don't use fake flowers under any circumstances. I like to be low maintenance too, but if you use fakes, you're only fooling yourself. Do use real flowers that are relatively inexpensive and easy to maintain. Don't choose anything overly fussy and demanding of your time if that's not your thing. Do read your labels and become familiar with your zone so you know what you're getting into.

Shrubs: Know Your Boundaries
Don't let your shrubs exceed the size of your house. Surely, there must be some 80/20 rule about shrub-to-house ratios and proportionate size to equal maximum curb appeal. Do invest in some good shears and research best times to prune. Don't ever trim, shape and/or dress your shrubs to look like humans, dolls, animals, or decorate with hula hoops, bows, signage or advertising. It's really humiliating for the shrub. (The only exception is tasteful holiday lights, when the season is appropriate, of course.)


Do have fun. Gardening and landscaping is hard work, but if you're not enjoying the process, you might want to find another hobby or enlist in a professional!

Good Weed, Bad Weed cover image used from this book review at Horticulture Magazine.

Monday, August 8, 2011

The August To-Do List

It's almost mid-August. Your gardens are tired of working for you all summer. You're probably tired, too. You can feel the season slowly changing ... The air smells a little different ... The days are oh-so-gradually getting shorter again ... Did you just see a leaf fall on the ground?

Hey!
Snap out of it!

Don't be fooled by back-to-school ridiculousness and promises of a new fall wardrobe. (As enticing as those new suede boots might be, they'll still be there in October, I promise.)

Summer is still here, and my calendar says it will stay here until September 23.
If you think your work is done, you're sorely mistaken.
So, grab your shovel and your bypass pruners because your to-do list just got a little longer.

From mulching to compost, bulbs to saving seeds, deadheading to weeding, there's still plenty to do this year and in preparation for next spring. There's even time to plant a late harvest garden. Take it from the experts, About.com and Better Homes and Gardens have compiled some great August tips to keep your garden going through September and beyond.

I think I'm even crazy enough to try a fall container garden this year...yeah, even after I got on my soapbox about containers.

Wednesday, August 3, 2011

Pretty Little Aprons For Us Dirty Gals

Aprons have been coming back in a big way (not that they ever really left!)

They're perfect for this time of year, whether you're harvesting vegetables or need a tool carry-all in your cutting garden. They're not just for in the kitchen, you know!

The DIY crowd has been having a field day--check out some great how-to sites below to create your own. Or, if you're lucky enough, maybe a super crafty friend will whip up one for you as a wedding present. (Thanks, Jen!)

But, with aprons as cute as these, who'd want to get them dirty? 

Left: Recycled denim "Easy Peasy Gardening Apron" by Wienerdog Tricks, check out the how-to on her blog as well as other cool sewing projects (if you're so inclined).
Top Right: Martha Stewart's up-cycled gardening apron, make old new again with these easy instructions.
Bottom Right: The ultimate step-by-step DIY apron by Design*Sponge.


Left: Not a gardening apron, but fun anyway, I like the cheat-sheet approach of Perpetual Kid's upside-down apron, as featured on FreshHome.
Top Right: My wedding present apron made by my friend Jen! Also came with matching potholders. Cute, right?
Bottom Right: Ruffled goodness, the Seed Apron by Vermont Apron Company, (yes, they are made in Vermont).


Saturday, July 9, 2011

PSA: An Important Lesson in Planning

You know how before you do something major outside, you're supposed to call Miss Digg to "know what's below," as to not do any damage to gas and utility lines? Well, the same can be said about gardening. (And, no, my house didn't blow up, and yes, the street still has power.)

I have this little hot spot. Literally, full sun, all day, every day. So, last week I had the grand idea to plant a coneflower garden of all types and colors. I go to Romence Gardens last Monday when they were having 40% perennials (score!) and pick out 10 of the best, in traditional purple and also fuschia, green, orange and yellow.

I get home and I go to work to break up the sod and soil. It's tough, it's hot, I'm working, the grass and weeds are breaking up, and I start to churn the dirt and THUNK. I try a couple more times, THUNK. I haven't quite figured it out, but apparently, that's STILL driveway underneath that narrow strip.

So, the lesson learned is, "know what's below" BEFORE you go out buy your flowers, and/or have a back up plan if your space doesn't work out. Seriously, where am I going to put these?

My "hot spot" pre-dug, now eyesore.


What am I going to do with all of this coneflower?

Friday, May 20, 2011

Humble Abodes

How about creating some homes and habitats for the creatures that literally help your garden grow?

Bird Houses
Bird houses add instant charm to any yard and come in just about any style (and price range) to fit your fancy. Or, you can always build your own, if you're feeling crafty. Bird houses also play a role in bird conservation, particularly in urban areas where there are fewer natural places to nest. But, not all bird houses are created equal. Certain houses attract certain types of birds, so if you want to woo a particular species, do your research.

Mason Bees
Mason bees are solitary, workaholic pollinators and rarely sting. Since they live sans roommates (meaning, they don't create colonies or hives with others), give them a comfy place to call home. I love this idea from Martha Stewart on how to create a simple home for Mason bees out of bamboo sticks.

Bat Houses
Unfortunately, bat populations are diminishing due to declining habitats. Sure, many of us cringe at the thought of creating environments to attract bats, but hear me out. Bats eat mad amounts of mosquitoes, moths and other troublesome insects. A single bat can eat anywhere from 2,000-6,000 insects per night. For all you vegetable gardeners, this is another great means of organic pest control. And, if you give them a proper home, the less likely they are to squat in yours.

Check out this site for more fun facts about bats, and the right way to purchase and install a bat house.


Top left: Martha Stewart's bamboo mason bee home. Middle left: Chic bird houses from Romence Gardens. Bottom left: Crate and Barrel's driftwood bird house. Middle: Victorian bat house from Best Nest. Right: Anthropolgie's ultra-modern bird house selection.

Friday, May 13, 2011

Garden Pick-Me-Up

Someone at work is collecting coffee grounds for their garden. How do I know this? Well, my super sleuth skills have honed in on the plastic container on top of the coffee maker with a label that says “coffee grounds.” If they are not for their garden, what else would they be for?

Actually, there are quite a few uses for spent coffee grounds—odor absorber, abrasive scouring and cleaning agent, skin exfoliant, and yes, cellulite reducer.

But, coffee grounds are best used in the garden. Here’s the why and how:
  • They are a compost pile wonder. Just toss in, filter and all (teabags, too!) Consider them “green” not “brown” material (even though, yes, they are in fact brown), but they are full of nitrogen, which essential for plant growth. 
  • Create a natural fertilizer by applying grounds directly to beds and working into the soil. Plants that prefer more acidic soil, such as rhododendrons, azaleas, roses and even fruit trees will particularly develop a caffeine addiction. Or, use this recipe to create a fast-acting liquid fertilizer. Dilute coffee grounds with water at a rate of ½ lb coffee to 5 gallons of water. Mix and spray!
  • Rumor has it that grounds repel slugs, snails and ants. Chemical-free pest control!
  • Use as a mulch in beds or containers.
  • Amend your soil (pre or post planting) to improve the texture and pH, and attract worms.
So, stock up because whether you use your own, collect from the office or visit your local Starbucks, you really can’t have too much. (Note: I’m not entirely sure, but I think you can still go to Starbucks and take as much as you can carry. I’m sure any local coffee house would give away grounds for a good cause. Ask around!)

I’m not going to get into all the facts and figures about coffee ground waste in landfills. Just check out this page, which gets into the science, and sustainable and social causes behind grounds.

Sunday, May 8, 2011

Creeping Charlie, You're Dead to Me!

I say in my best Tony Soprano voice...

I'm waging a war against Creeping Charlie, a formidable landscape enemy.

Creeping Charlie is an invasive ground cover that is part of the ivy family. It crowds out the grass, it's rhizomes make it quick to spread, and it's really tough to completely eliminate. And, if you hear someone say it only likes damp, shady areas, they're liars, because the majority of my yard is in full sun. And, the majority of my yard happens to be Charlie.

I'm taking back what's mine through force (and extreme measures, if necessary). I have my arsenal planned, and while nukes aren't an option (although, I have heard of people using a blow torch), being vigilant tends to be the best strategy. Hit hard, hit often, in the fall and after it flowers in the spring for best control. Yes, control. The success stories of those who have actually eradicated Charlie are few and far between.

A great lawn is the foundation for any great landscape. And, I want to be able to run barefoot through my own backyard. If it takes a persistent herbicidal cocktail, so be it.

If you think I'm exaggerating, check out this string of Charlie woes, treatments and results.

Sunday, May 1, 2011

The Case of the No-Bloom Daffodils

Over the weekend, I received my first reader question. Heather from Farmington Hills asked, "Why for two years in a row now, have my daffodils only been producing foliage and no flowers?"

While we believe our spring bulbs will tend to produce season after season, they will run their course over time. The key to keeping that full and replenished look, is to add fresh bulbs to the mix every fall or every other fall.

However, I know this is not Heather's situation. Her bulbs are only two years old. So here are a few scenarios and solutions.

1. The bulbs themselves may have been too small at planting to produce flowers. With bulbs, bigger is better. Bulbs do get bigger over time, so there is still a possibility that they may bloom...Eventually. Have patience, if you feel compelled to wait it out.

2. Try some fertilizer. Sometimes bulbs just need a little bit of encouragement. But, be careful not to overfertilize. Too much nitrogen will perpetuate the same problem--too many leaves, no flowers. Never use lawn fertilizer.

3. Sometimes bulbs are just particular about their environment. Is it too shady? Are there adjacent plants that are competing for sun and nutrients? What is the soil like? Take my daffodils for example. Mine (photo left) have just about had their fill, and yet my neighbors to the south (photo right) and the west are still in full bloom. Go figure.

4. Hate to say it, but sometimes you just get duds. And unfortunately, there's no remedy for a bad bulb, except to try, try again, with new bulbs, of course.

My two cents, wait until fall to replant some new bulbs. Now is the time to start focusing on summer flowering shrubs and perennials.

One more important note about bulbs while we're on the subject. Once blooms are spent, don't get too eager to cut back the leaves. As unsightly as they may become, the leaves take in the sun, which then feeds the bulb for the next season. Love daffodils?

Sunday, August 15, 2010

Stop What You're Doing

I was on an evening bike ride when I observed a woman in the neighborhood lightly showering the flowers in her yard. It occurred to me that it's never too late to promote proper watering technique.

Yes, there are right and wrong ways to water your flowers. The "showering technique" would be in the wrong category.

First off, morning is always best, which allows the roots to soak up most of the water before the afternoon heat kicks in. If you water on a hot summer afternoon, most of that water is just going to evaporate. Additionally, late evening waterings are no good because the wet, cool soil can lead to mildew and other plant diseases.

Secondly, go for the roots only. Your actual flowers and buds really don't need a drink. And water that accumulates on leaves and stems can also lead to disease. Give it to the roots. That may mean you have to lunge, squat and contort your body in all sorts of ways to get to that container in the back of your garden, but your flowers will thank you for it. And bonus, you get your leg workout for the day. If you do want to take the easy way out, at least opt for a soaker hose and skip the ineffective oscillating sprinkler. If you have tricky areas, invest in a hose wand to give you some extra reach.

Lastly, quality over quantity. You may feel compelled to shower your flowers for a few minutes every day. Stop. Brief sprinklings promote shallow roots, which cause flowers to dry out quicker and can lead to overall poor performance. You're much better off to water just a few times a week, but when you're watering, go for the roots and just hold the hose there for 10, 20, 30 seconds, until the water starts to pool a bit. Then let it drain. Repeat if necessary. Longer, deeper waterings promote healthy root development.

As we get closer to fall, proper watering technique is also crucial as you start to divide/replant, or plant new bulbs and perennials. Same rules apply. Healthy roots now result in fabulous flowers in the spring!

Thursday, May 20, 2010

Hardy Advice for Those Ready to Dig In

After a couple of weeks now of talking flowers, I was finally able to spend the last few days making real progress in my own gardens. Within my front yard, I had one particular patch that was starting to become a problem because of crowding and overgrowth among some mums, day lilies and the surrounding evergreen shrubs. (Sidebar: That experience alone really illustrated the importance of dividing your perennials every couple of years or so to prevent this from occurring. The best part about dividing is I now have great perennials to add to other locations in my garden or new beds, as I have a lot of projects in mind.)

It was admittedly a little hard to get started. Many of my perennials grew in so fast and so thick this year, I missed out on opportunities to divide, transplant, clean out old growth, pull weeds and other invaders, and the like. So, I'm now turning my attention to those areas that I do have more control over. As you get going in your own gardens this spring and summer, here is a little bit of advice based on my own experiences.

First and foremost, try not to get overwhelmed. My yard is a fairly good size with lots of space and beds that surround the house. I'm always adding new beds, and I never know where to begin. This year, I'm really trying to focus on one area at a time, and think through what I like about it, what I don't like about it, what doesn't look or feel right. It's not always as apparent as you think it would be. Sometimes I just start by pulling weeds and just see where that takes me. I'm definitely trying be a little more intentional with my gardens this year. I have a lot of "grandiose" ideas and I am trying to exercise more self control when I'm roaming the greenhouses.

Secondly, when you are adding new perennials, or dividing and moving things around, there will be some "casualties of war." Transplants will go through a little bit of "shock" in their new location, but just keep them watered thoroughly until they have had time to adjust. I have also experienced the disappointment of planting a perennial and not having it grow back the following year, or worse, having it grow in diseased. It's easy to get discouraged, but just keep trying new things. If you have flowers that are in good shape, but just don't seem to work in your garden, rather than kicking them to the curb, swap them with a friend or neighbor.

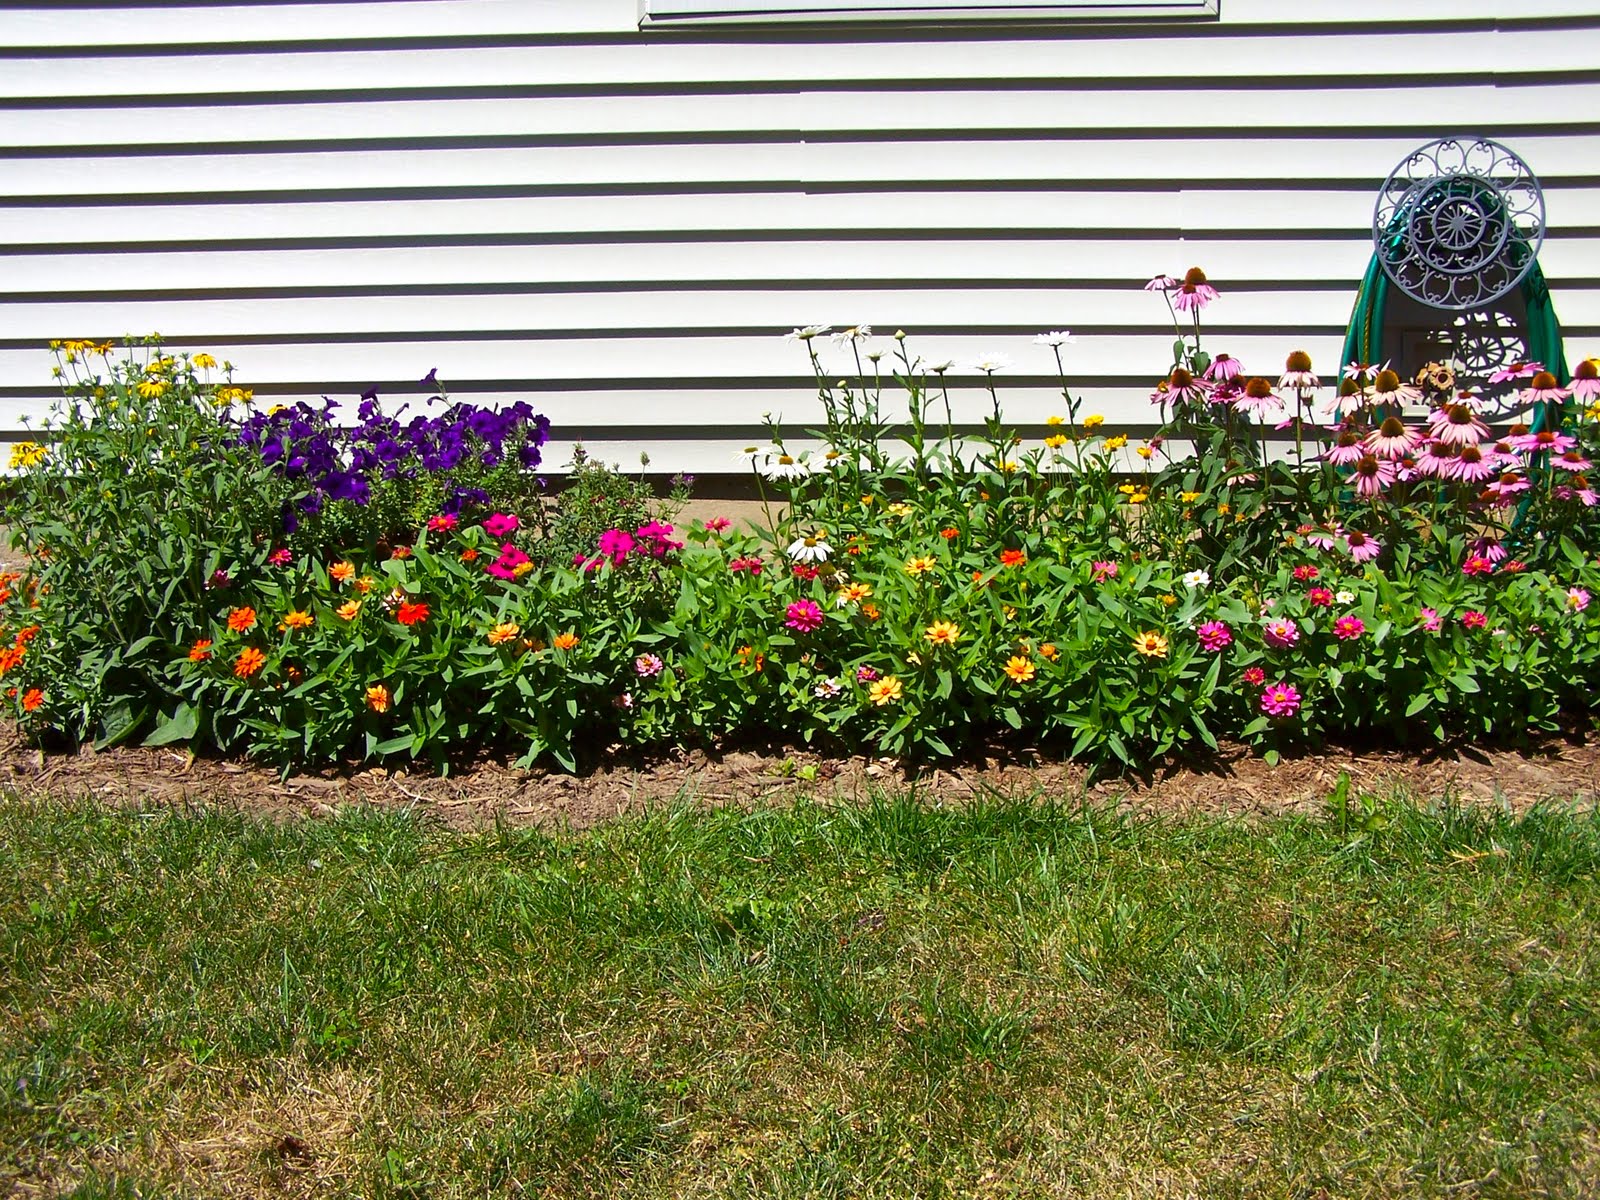
Gardening isn't rocket science, but it kind of is, in a way. There are a lot of factors that contribute to a plant's success such as the condition of the plant itself when it is purchased, your soil type, sun/shade and water requirements, pests, and I could go on. If you really want a maintenance-free garden, you'll definitely want to stick to some of the hardy favorites such as hosta, shasta daisy, black eyed Susan, coneflower (pictured) and day lilies.

Lastly, experiment and allow your tastes to change. Just like fashion trends, my style preferences for color, texture and silhouette change every season. Whereas last year, I wouldn't have even dreamed of adding begonias to my annual collection, this year, I can't wait to fill containers with their bright hues. Annuals are a great way to experiment with shape and color. If you find something you really adore, you might be able to find a perennial to mimic the look and feel. There are many flowers that I am excited to experiment with and welcome to my garden this year including hydrangea, Russian sage, begonia, clematis, hardy geranium, fountain grass and dahlia. And, I'm kind of wondering, what took me so long?

Saturday, April 24, 2010

Peony for your thoughts?

It's not even May yet and my daffodils are done, my tulips are on their way out and I swear my lilies will be sprouting buds any minute now. The biggest surprise was my foot and a half tall budding peonies. Much to everyone's enjoyment, spring came early this year. Whereas I usually don't make it into the yard until Memorial Day weekend to start planting containers and putting in new perennials, the time has come to start preparing.

The one thing I have failed to do every spring since I have lived in my home is properly support my peonies. These gorgeous ruffled blooms are heavy with fragrance and well, just plain heavy for their delicate stems. And typically, just after the first great storm or two of the season, they droop to the ground and wilt away just as quickly as they blossom.

Peonies really aren't all that demanding for being such an impressive flower. In addition to finding them a home in a nice sunny spot, try setting up a support system
to prolong their lifespan. If your peonies are small, individual stakes may work if you have the patience and diligence to tie each stem. My peonies, on the other hand, are full-on shrubs, so I've opted for a more simple method, similar to that of a tomato cage. Even better are the grow-through type supports that allow for a better separation of blooms.

I kept telling myself, "If I only do one thing this gardening season, I'm going to support my peonies." It was quite an easy mission to accomplish, and I'm excited to see the results.
Related Posts Plugin for WordPress, Blogger...